
A website is not truly live until it comes online. Having a solid plan at deploy time will make or break the release of new features. When it comes to deciding what service to use for hosting and deploying a site, it’s critical to understand the purpose of the site you want to deploy. Do you wish for automatic deploys of your primary branch or would you rather have more control? How important is continuous integration (CI)? Do you have a static site or a huge database of user information?
In this article, we will cover four happy deploy paths to getting your website online, and the benefits and costs of each plan. I’ll also discuss one potential integration plan for your Shopify app environment. No matter your skill level or experience, at least one of these paths should work for you.
Before we start, you should have something to deploy (a codebase or repository) as well as a domain name you’d like to use. Shopify offers domain name registration if you need to grab one. If you’d like to skip straight to my favorite choice for deploying with Shopify, check out the section on Heroku.
Table of Contents
So which option is the best for my Shopify app?
1. I have a static website and a GitHub account: GitHub Pages
If your page is completely static, that is, the completed site’s code is compiled before you add it to the repository (usually into a “build” or “dist” directory), there are a number of hosting and deployment options that cost nothing. One of the most basic (and completely free) options is to host your site on GitHub Pages.
To deploy your first site with GitHub Pages
1. Log in to GitHub and create a new repository at "username.github.io" where “username” is your account username. You may create a page for your GitHub Organization instead.
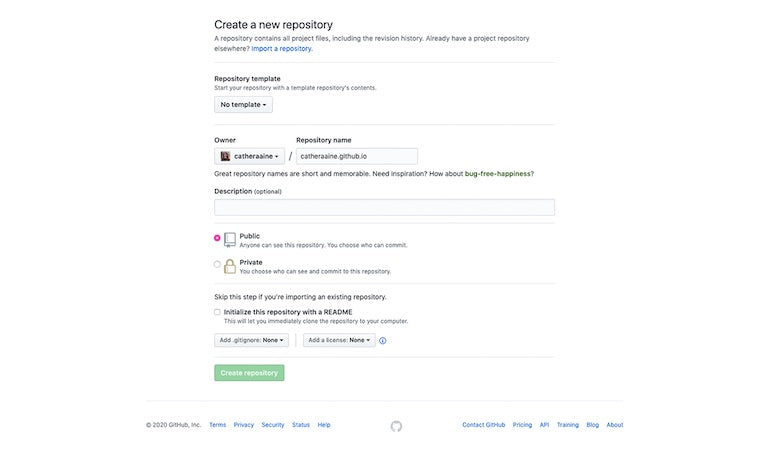
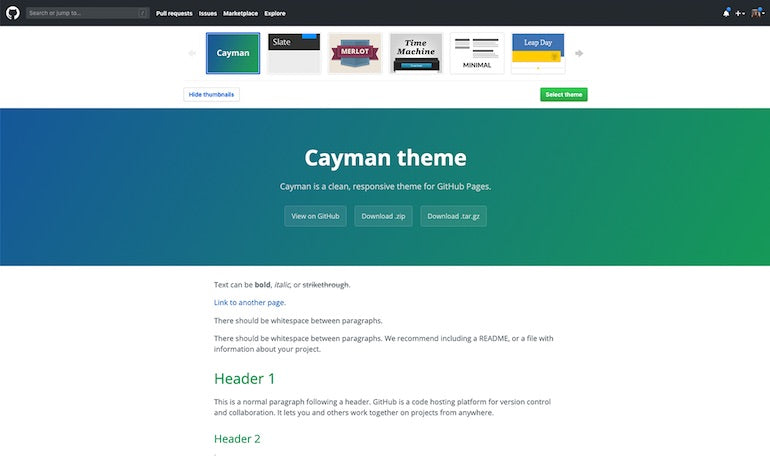
2. On the “create a repository” screen is an option to either choose a theme and automatically populate your repository with an empty Jekyll template, or you can do what I do and write your own static pages on a primary or master branch.
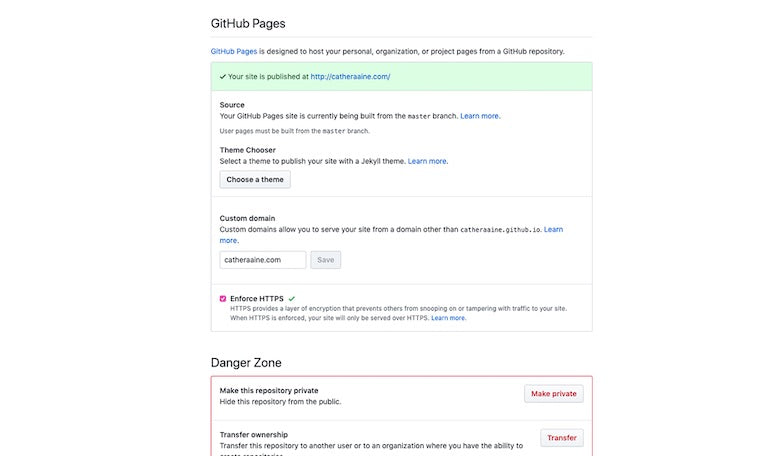
3. If you'd like to add a custom domain, you can do that on the “create a repository” page as well. There are a few more steps to adding your own domain, such as telling your domain service provider the IP address of GitHub Pages and waiting a tick for things to populate. Detailed instructions are available in GitHub's help section.
Enforce HTTPS if you'd like—I would suggest you do, as it makes your site more secure and establishes trust with your user. Plus, GitHub will generate the certificate for you for free.
4. Once you've set up your repository this way, GitHub Pages will look for an index.html file either in the root of the project or in a docs folder. And with that index.html file in your chosen deploy branch, your site is live!
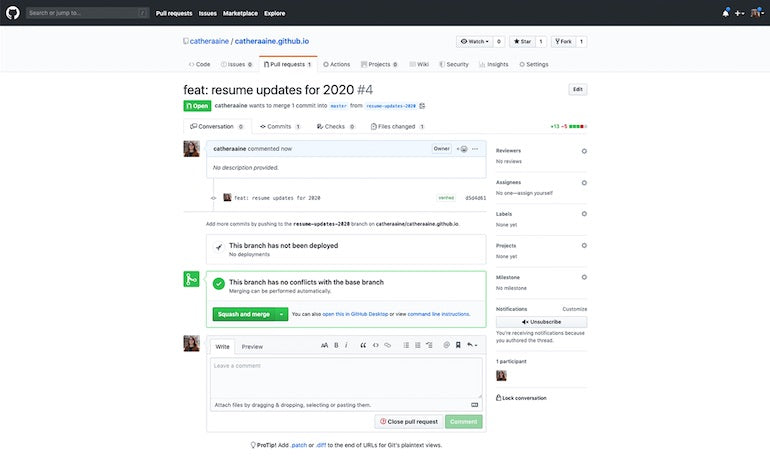
5. To deploy updates to your page, all you need to do is add commits onto your main branch, either directly or via a pull request.
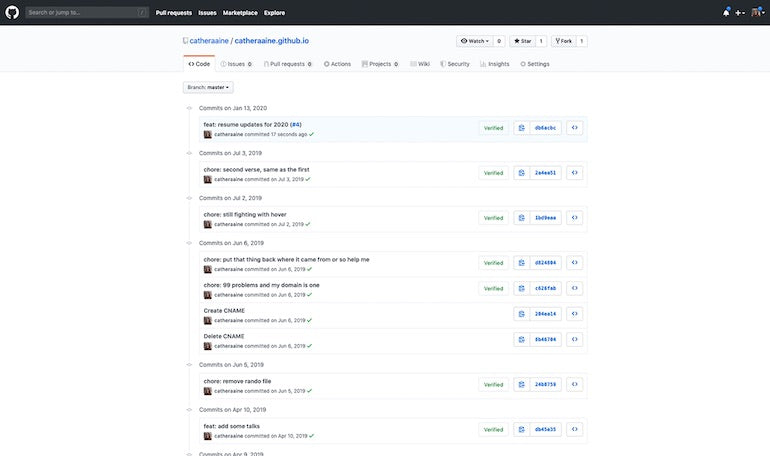
GitHub Pages does have a few major drawbacks. First, you are tied to GitHub as your version control platform. It wouldn’t make much sense to take your code to another service, like BitBucket, because you wouldn’t be able to push to GitHub Pages. You are also limited to one GitHub Pages site per account, and it must be a static site. Additionally, this is a no-frills path to deploying online. There isn't an integrated CI pipeline, and you don't get much feedback other than refreshing the page and seeing that things are updated.
There is some benefit to the one-page setup and automated HTTPS generation. For example, my personal "I'm a developer and here is my contact information" website is still hosted on my GitHub Pages account and probably will be for the foreseeable future. When I'm looking for a more robust static site hosting option, I turn to Netlify.
2. I have a static site, or a site built with a static site generator: Netlify
The first, and most glaring, benefit to using Netlify over GitHub Pages is the option to choose your git repository location. Any of the big three (GitHub, GitLab, or Bitbucket) are able to be fully integrated. For the sake of this tutorial, I’m going to stick with GitHub for my git cloud storage service. After you create an account on Netlify, you’re just a few steps away from a deployed artifact.
To deploy your first site with Netlify
1. Select the “add a site” option from the dashboard and you’ll be directed to choose your git repository storage provider.
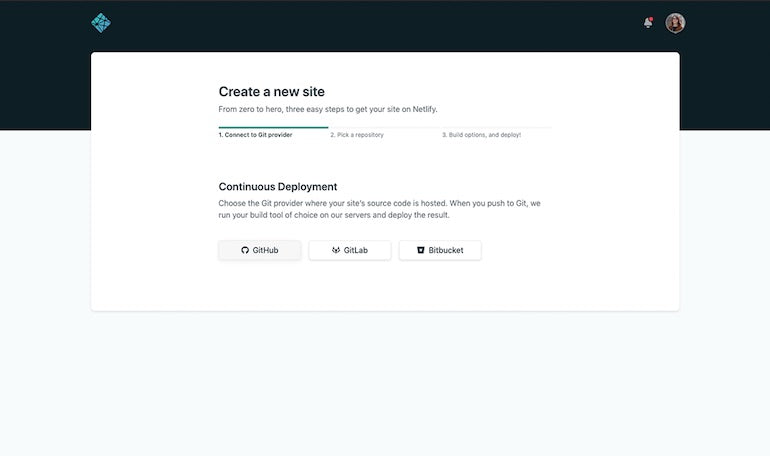
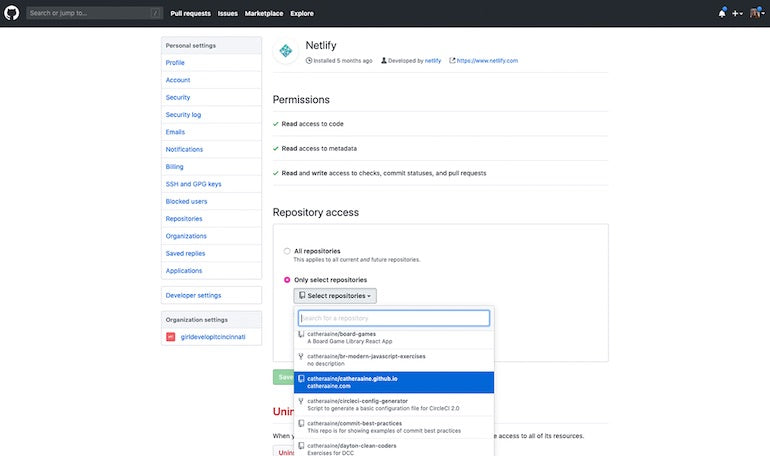
2. Once you’ve followed the onscreen prompts to connect a git provider with your Netlify account, you need to choose a repository to deploy. You have the option to enable Netlify permissions for all repositories in your organization or specific, named repositories. For security reasons, I like to add repositories piecemeal.
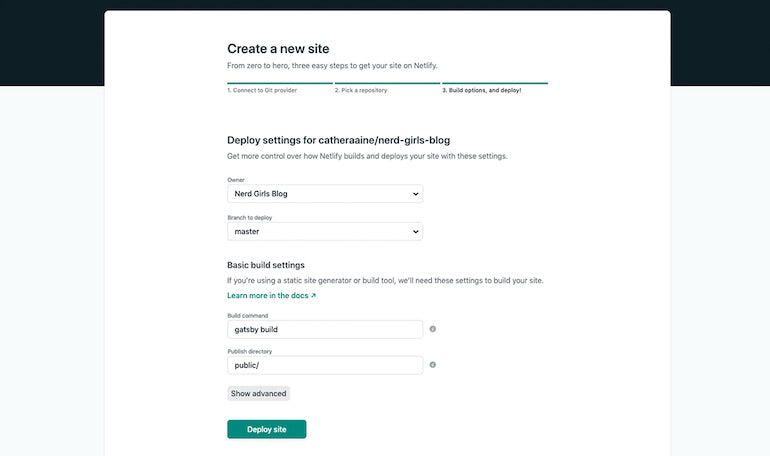
3. Netlify will give you a few more options to choose from, such as which branch and directory to deploy.
4. I recommend making a pull or merge request from GitHub (or wherever your repository is located) to take a look at the automatically-included continuous integration options. This CI is pretty bare-bones to start with, but you have the opportunity to create quite a robust system with Netlify itself.
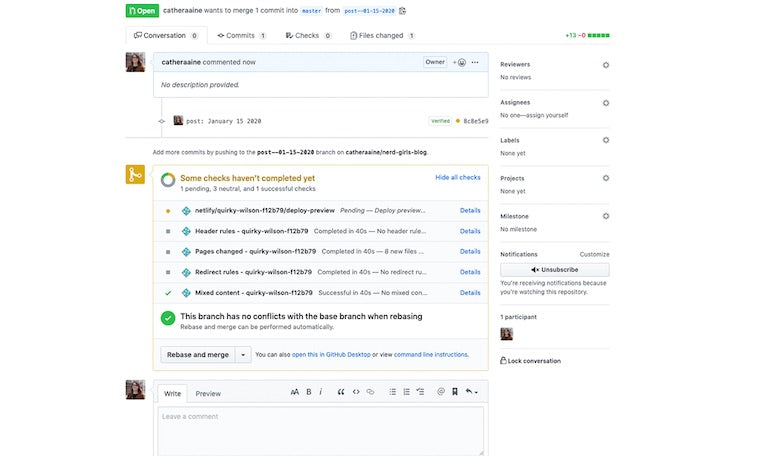
5. There, your site is deployed! Out of the box, Netlify gives you a unique subdomain to view your app, but you may wish to supply a personal domain. You can do this from the settings tab on your dashboard.

I use Netlify for my copy of the Gatsby Blog Starter as it comes complete with a “deploy to Netlify” button right in the documentation. I appreciate Netlify because of its low cost (free for my tier), integrated CI, and automated deploys whenever I merge PRs. It also offers support for functions as a service, form handling, and split tests, as well as any static-site generator you may want to use.
At Sparkbox, we have recently used Netlify for a couple of client sites, and the process has been overwhelmingly positive. It’s a great option for static or frontend projects. For apps that require a server-side piece, we like to use Heroku.
You might also like: The Shopify App CLI: A Tool to Help You Build Faster.
3. I want to take advantage of a more custom pipeline: Heroku
Both Heroku and Netlify meet the requirements of quality deployment pipelines; however, Heroku is unarguably more robust. Heroku offers a free tier, with apps that “sleep” after 30 minutes—perfect for us developers who like to mess around with tools before paying for them. I also like that Heroku offers a “hobby” level hosting option for $7 USD/month, which meets the needs of quite a few of Sparkbox’s client sites. The “hobby” level is usually necessary for anything more than test apps.Heroku offers multiple deploy paths; you can deploy with GitHub, command line git, or Docker. For the sake of consistency, I’ll step through the minimum effort, lowest-thought-required option: GitHub.
The best pipelines don’t require our teams to think about deploying. Instead, the team just decides if code is ready to be shared via a push to GitHub (or your favorite Git hosting service). The pipeline takes care of the rest.
To deploy your first site with Heroku
1. Make your account on Heroku. On the main page, select “New”, then “Create new app.”
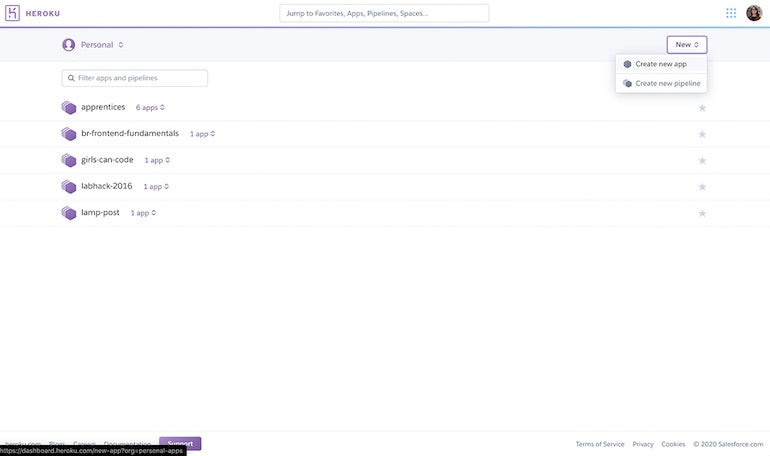
2. Choose a unique name for your application and continue to “Create app.”

3. You may choose to create a pipeline for your app, which allows you to connect multiple apps and create review apps. For now, I will focus on deploying our site without specifying a pipeline. Select “GitHub” from the deployment method options and search for the repository you wish to deploy. Then hit “connect.”
With GitHub properly configured, the response from GitHub should come fairly quickly (about 12 seconds for me). If you’d like, enable automatic deploys by selecting your desired branch and hitting the corresponding button. Automatic deploys keep your app up to date every time you add new code to the selected branch.
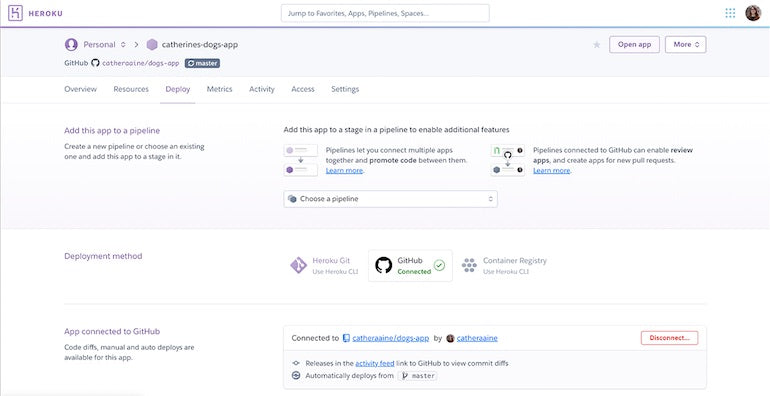
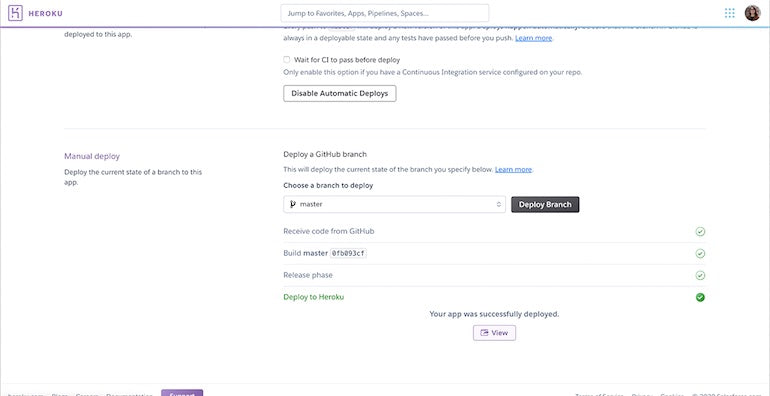
4. Whether or not you choose automatic deployments, your first deploy needs to be a manual one. Luckily, you only need to select the branch you’d like to be live and then select “Deploy Branch.”

5. After a few more seconds, you should be able to view your app live at the Heroku domain. Heroku is generally smart enough to determine what tasks to run. However, if you’d like to run specific or custom build tasks, you can adjust those under your app’s settings. Configuring your own custom domain is also available in the settings menu.
Pro tip: Check out the “Activity” page from the app dashboard for one-click rollbacks. You can also view server logs and run console commands under the "More" toggle.

Heroku should work for the majority of your needs as a developer, including your Shopify sites, depending on the chosen price tier and the number of “dynos” you’d like. For massive ecommerce applications, or really anything with a dedicated product team, you may want something more expansive.
You might also like: How to Use Relative Pagination In Your Application.
4. I am a confident developer, and my site is pretty big: AWS, Azure, Low End Box, and DigitalOcean
The ecommerce team I work with uses a large, scalable cloud hosting service, due to the expansive needs of a full-function web app. This is a massive, multi-brand website with thousands of unique data scenarios. Multiple services are available at this scale. Here are some of the most popular services currently available:
- Amazon Web Services (AWS) has made huge waves in the past few years by providing numerous hosting options and a highly customizable experience.
- Microsoft’s Azure is ridiculously popular, too, as its pay-as-you-go pricing model and top tier scalability make it an easy choice.
- If you’re looking for bare bones hosting and super cheap prices, Low End Box offers just that.
- I have a personal attachment to DigitalOcean, one of the smaller fish (hehe) in this list. DigitalOcean’s extensive documentation and welcoming community make it an easy choice for me.
I was first introduced to DigitalOcean via Hacktoberfest, an event they sponsor every October designed to get more people contributing to open source projects. I’ll walk through how to set up a “Droplet” (virtual machine) on DigitalOcean.
To set up to deploy with DigitalOcean
1. You can sign up for DigitalOcean via GitHub, Google, or just by making an account. I’m going to sign up via GitHub. Unfortunately, as soon as you get past that easy step, you hit a paywall. DigitalOcean currently doesn’t offer any free tier for their services (though there are a number of those options above). I’ve luckily got a little credit, so I can still walk you through the setup process. Hosting a single Droplet will cost you around $5 USD/month.
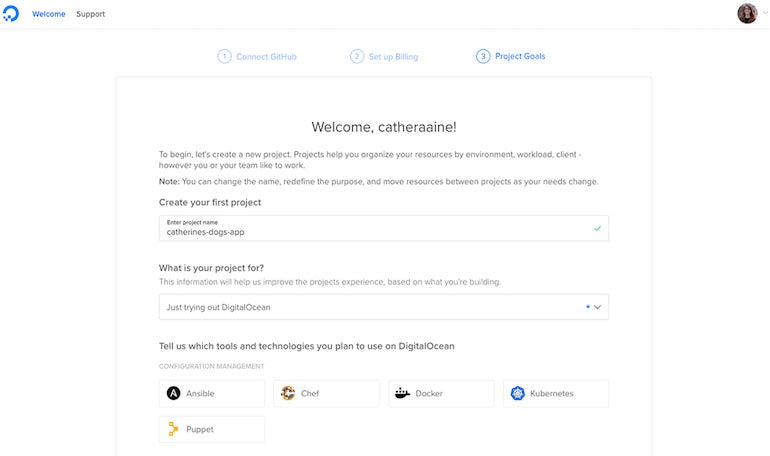
2. After you figure out payment, you’ll be asked a few survey questions. Here you’ll name your app and get set up with a couple of technologies by default. I skipped a few of the nosier questions and went right on to the dashboard.
Note: The “app” here is what we’ll call our complete pipeline. Meanwhile a “Droplet” is the virtual machine your app uses to run, like a digital computer on a server.
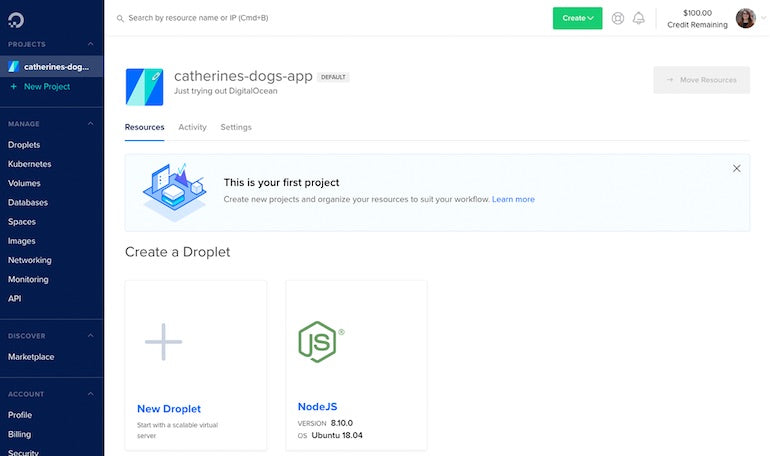
3. In this case, I’m deploying a Node.js app. So, I clicked the “Node” option and have a pre-populated Droplet I can click on the next page.
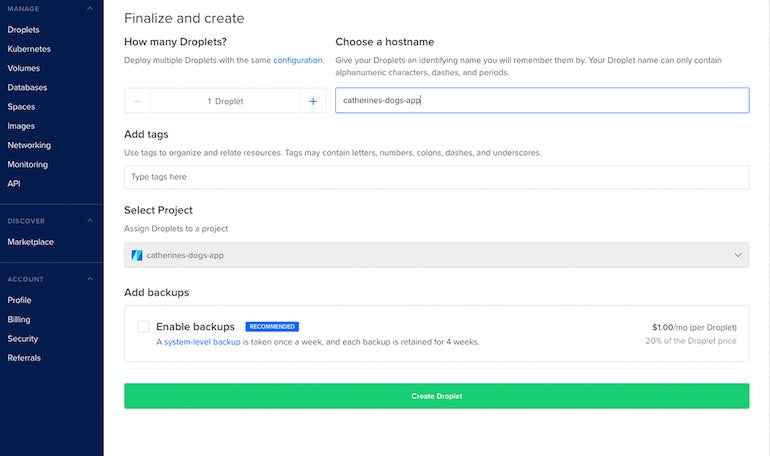
4. You can scroll through options for the plan/storage size, server location, authentication, and more. Again, you’ll have to name your Droplet—I’ve just named mine after the app. When you’re ready, select the “Create Droplet” button to continue.
Note: For long-term use, you’ll want to set up SSH (Secure Shell Protocol) to establish a strong, simple way for the service to identify your machine. DigitalOcean offers an in-depth tutorial on setting up SSH in their documentation.
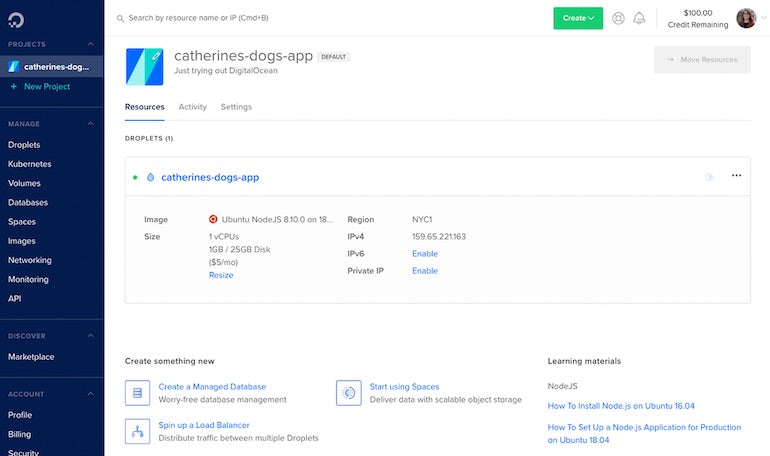
5. From this point, you’ll want to SSH into the virtual machine from your local console or use the in-browser console to clone your project onto your virtual machine from GitHub (or wherever your repository is located). Install dependencies as per your build requirements, and start up your app. You should be able to cURL your localhost and get a return with content from your app’s homepage. For example, if your site was running at port 8000, you could run curl http://localhost:8000/ and hopefully get a response.

There is a bit more to do here to get your site fully live, such as setting up a proxy server (like Nginx). However, there is a whole lot more customization and nuance than I could ever cover in a single blog post. I heartily recommend checking out the DigitalOcean blog and their recently acquired learning platform Scotch.io for more detailed tutorials from this point forward.
Once your app is up and running on the server, you can access it by typing the server IP into your browser window. Custom domains are available on DigitalOcean and setup is very similar to the previous services on the list. However, you will likely not need a full-feature service like DigitalOcean for most small-scale Shopify apps.
So which option is the best for my Shopify app?
For the quickest, cheapest, and most feature-rich option to deploy and host your Shopify apps, I recommend Heroku. Although my tutorial represented the browser-based GitHub deploys on Heroku, you also have the opportunity to deploy via the heroku-cli—which could be helpful in some situations.
Either way, Shopify provides a Ruby gem called the shipit-engine which makes your Shopify deploys quick and worry-free. All you need is a GitHub repository, a branch with some code, and a deployment environment like Heroku. So, head over to Shopify’s repository and follow the readme to install the ShipIt Engine gem—you’ll be online in no time.
And that’s it! There are numerous hosting and deploying services available to you, but these are some of my favorites. Whatever you choose, I recommend keeping your most recent codebase site safe in an online version control storage service like GitHub, GitLab, or Bitbucket. A repository provides the opportunity to quickly change deployment strategy in the future. As your traffic scales, you’ll learn and adjust to best serve your clients and users. Hopefully, I’ve equipped you with knowledge of a variety of options to prepare you to make good decisions when the time comes.
Read more
- How to Build a Shopify App: The Complete Guide
- 5 Community-Built API Tools Developers Should Check Out
- Build with Hydrogen: Developer Preview Now Available
- How to Level Up Your App with Theme App Extensions
- Checkout Extensibility Opens New Ways to Customize Checkouts on Shopify
- How to Choose the Right Pricing Model for Your App
- Getting Paid: An Overview of Shopify App Billing Cycles
- Building Secure Shopify Apps
- How Web Fonts Can Enhance Your Client’s Custom Ecommerce Store
- Free Webinar] Getting Started with Sass and Shopify
What’s your favorite deploy method? Share your thoughts below!


