One of the toughest challenges designers face when pitching prospective clients is winning over their trust and confidence. If your prospective clients haven’t worked with you in the past, they’ll likely have hesitations about handing over their hard-earned cash to a stranger. To win their confidence (and close the deal!), you’ll need to take some extra steps to reassure them that your design work will not only be a success aesthetically, but that it will also help them achieve their business objectives.
One of the greatest tools in a designer’s arsenal for overcoming this unique obstacle is the case study.
Case studies are narratives that reveal what you are capable of as a designer. They allow you to walk prospective clients through the contextual details of your existing project work, including your design brief, prototyping, and final product, so you can outline your creative strategy from conception to completion (learn more about rapid prototyping, and take a look at some great prototyping tools to help with this process). They are the perfect tool for boosting the quality of proposals, building your web design portfolio, and adding credibility to your portfolio website.
The best case studies move beyond intuition-based explanations and document the rationale behind the design, UX, and visual decisions. They offer a more humanized perspective into the design process that, ultimately, makes a business case for your work. This leaves you in a better position to prove your value (and price) to even the most skeptical client.
You might also like: How to Create a Compelling Web Design Portfolio
First things first: Plan for your case study ahead of time
Before we take a deep dive into the kind of content that makes a great case study, I want to stress the importance of creating a case study for each project you work on.
While this may seem like a lot of extra work, you can facilitate the writing process by taking the time to proactively think about how you will document your projects and their successes before you begin working. That way, you’re guaranteed to end the project with strong documentation that reflects your thinking, iterations, and key results as accurately as possible.
With that out of the way, let’s take a look at the five core elements that should be included in any case study.
You might also like: The Ultimate Guide to Finding Web Design Clients.
The 5 core elements of a web design case study
1. The Overview
Think of your Overview section as the executive summary of your case study. It’s the Cole’s Notes version of the document, and allows your prospects to quickly understand the highlights of your past work without reading the entire thing. This section should include the core takeaways from all other sections including the main problem, an overview of the solution, and key results.
While the Overview will be your least detailed part of the case study, it is probably your most important. Only the most meticulous clients will take the time to read through your entire case study; the majority of them will just quickly skim through in order get the gist. Because of this, drafting a complete and well-articulated overview should be your top priority.
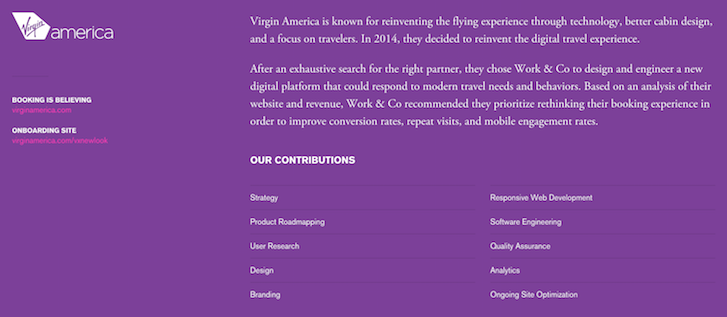
An overview section can be as simple as this example by Work & Co.
Pro Tip: Write your Overview section once the rest of your case study is finished. That way you can simply scan over the main points of each section and summarize them into a one or two paragraph synopsis.
2. The Context and Challenge
The second section of your case study — commonly referred to as the Context and the Challenge — is designed to provide your prospective client with a detailed description of the context that led to the creation of the project. If it’s well-written, the reader will leave with a solid understanding of the environmental factors and problems that you were hired to solve as a designer.
This section can be distilled into three main elements:
1. Project background and description — The contextual information for the project including timelines, budgetary constraints, and the overarching purpose of the job.
2. The problem — The “why?” and the focal point for the project. Your case study needs to clearly explain the problem that led to the onset of the project. For example, if you were working on an ecommerce project then your problem could be something similar to:
“Interest for company X’s core product was growing internationally at an unprecedented scale. This led to severe logistical and distribution problems that could not be fixed by physical retail solutions alone.”
3. Project goals and objectives — Every website you work on should have tangible goals and objectives associated with the project’s problem. Are you trying to drive more traffic to the site overall? Optimize product pages for lower bounce rate or higher conversions? Reduce cart abandon rates? No matter what your objectives are, try your best to include any quantifiable metrics that were known at the onset of the project.

A simple, yet descriptive, “challenge” in Super Top Secret’s case study
Pro Tip: The core elements of The Challenge are often presented to you in the project Request for Proposal or creative brief. If you are working on a more personal level with your client, however, try capturing this information in conversation. This will become the basis of your brief and, eventually, your case study too.
3. The Process and Insight
The purpose of this section is to elaborate on your design process, creative concept, and insight that led to your design decisions. It’s also an opportunity for you to walk your prospective client through the research, workflow, and iterations of your design work.
When writing content for this section, you want to illustrate how you got from The Challenge to The Solution. Make sure the flow of information is logical and that it culminates with a core insight about your client’s audience, business, or industry. These insights can stem from your client’s unique selling properties and key differentiators, or from their audience’s behavioural and consumption habits.
To ensure your reader conclusively arrives at these insights as well, you’re going to need to thoroughly document your research. Include any details about A/B tests, user research interviews, and key brainstorming takeaways that led you to uncover those crucial pieces of information.
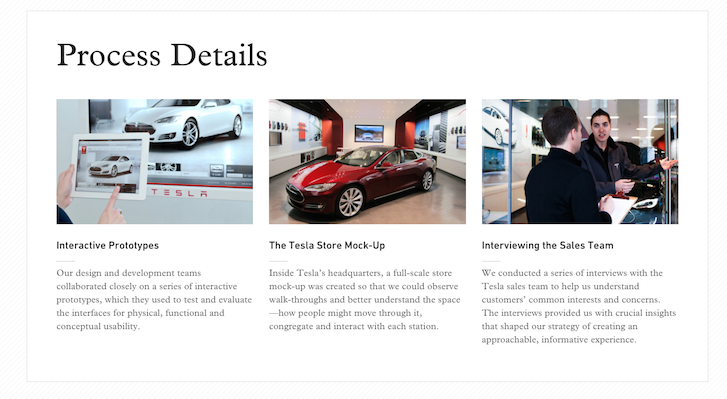
A simple version of a “process section” from nurun’s case study
Pro Tip: Finding a core truth about your client’s audience can be one of the toughest challenges as a designer. If you’re lucky, your client might already have substantial research about their customers. Use their knowledge and this research to help you craft an insight. Otherwise, try employing tactics like A/B testing and user research to help guide your design decisions.
4. The Solution
The Solution is where you get to show off your skill and style as a designer. It’s your chance to feature any and all samples of your work — from videos, landing pages, custom integrations, and anything else you created for the project.
To really get the most from this section, be sure to include written descriptions about your design work. Take the time to explain in detail your site’s defining features like its UX, navigation structure, content strategy, or unique mobile attributes. If you put the effort into crafting descriptions that complement your visual assets, your readers will feel much more confident in your decisions as a designer.
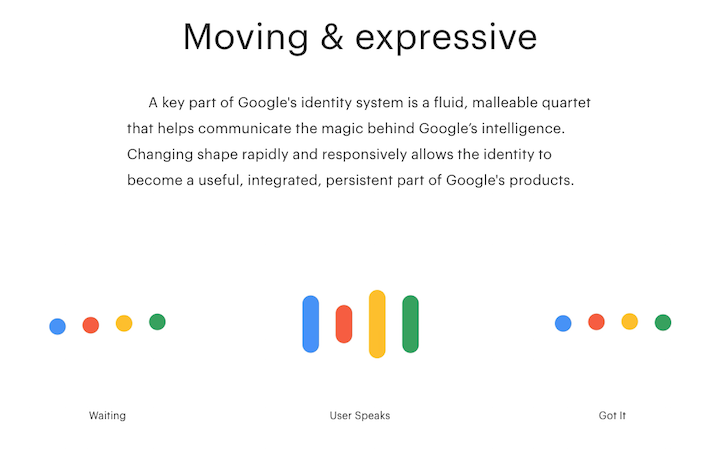
A sample highlighting animated design elements from This Also’s case study
Pro Tip: Remember, the medium is the message. Don’t limit yourself to screenshots alone. Incorporate interactive elements - animations, video, transitions, or anything else - that accurately represent your design work to really wow your prospects.
5. The Results
For most business owners, it’s all about the numbers. That’s why this section is crucial for an effectively written case study.
The Results section will cover the qualitative and quantitative success metrics from your project (and if you've tested your product, such as with a contextual inquiry, you should have great metrics to share!). While the type of metrics you report on can vary from one project to another, they should directly address the objectives you established in The Context and Challenge section. Having these results in hand will allow you to show your prospects that your work had a direct influence on your client meeting their goals. If you can do this, you’ll help them feel more comfortable putting their business (and their money) into your hands.
In addition to, or in lieu of, quantifiable metrics, consider including one to three testimonials in this section. These testimonials are another great tactic for boosting the confidence of your prospects. Since the source of these reviews come from outside your business, prospects are more likely to trust them as a reputable reference. When including your testimonials, however, keep them short and sweet. They can be as simple as one or two sentences, so long as they illustrate your previous client’s satisfaction with your work.
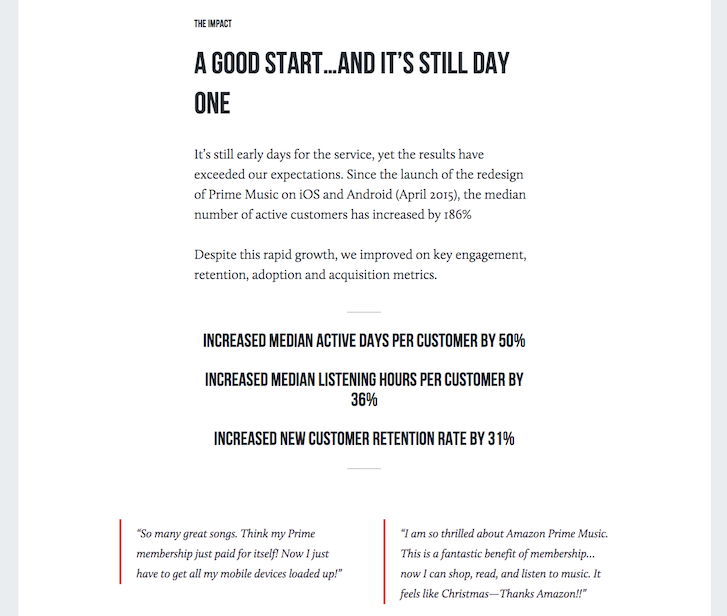
A nice mix of qualitative and quantitative results from Simon Pan’s case study
Pro Tip: Be sure to collect testimonials from your clients near the tail-end of your project. Ask them to speak about your process, creative thinking, and the quality of the final product. Just make sure you get their approval to publish them!
5 examples of creative web design case studies
Although case studies should include a lot of important and somewhat formulaic information, they are still an expression of your unique personality and style. This means you have all the liberty in the world to get creative with their format and presentation. To give you some inspiration, here are five examples of creative web design case studies that we loved reading.
Aerolab — Xapo
Fantasy Interactive — Airlines Project
Michael Evensen — Soundcloud App
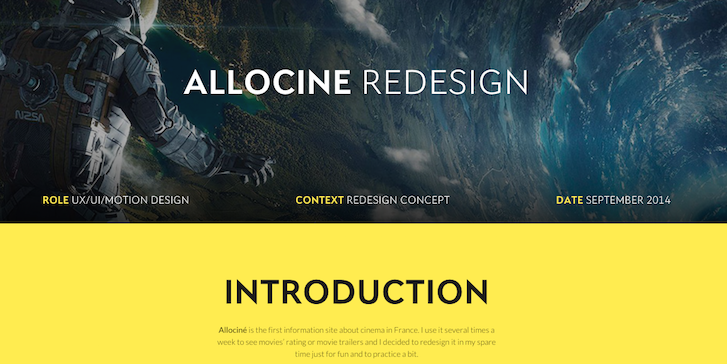
Robin Noguier — Allocine
Super Top Secret — University of Oregon
Do you have any case studies that you’re proud of? Share them in the comments below.
Read more
- Why Your Contact Page is the Most Important Part of Your Portfolio Website
- Freelancing 101: How to Market a Small Business
- The Ultimate Guide to Getting Powerful Client Testimonials (With 6 Simple Questions)
- Prove Yourself: 4 Ways to Demonstrate Your Expertise
- The Importance of Investing in Your Own Website
- How You Can Maximize Your Marketing With Any Budget
- The Profitable Ecommerce Designer
- How to Build a Great Design Portfolio — Shopify Designers Weigh In
- 6 Tips on How to Get Clients


