When you’re shopping for a Shopify theme, you’re seeing it at its best—preloaded with images, fonts, and colors that make it shine. This is a great way to see a theme at its full potential.
But once you’ve installed it in your store, it won’t look finished until you dive into Shopify customization with your own design choices. Customization is what transforms a default theme into a branded storefront that builds trust, boosts conversions, and creates a shopping experience customers remember.
With Shopify’s new Horizon framework, themes are more modular than ever, so you can move faster from out-of-the-box to fully branded. This guide breaks down Shopify theme customization—what it is, how it works and what you can do to promote your brand and drive sales in 2025.
What is Shopify customization?
Shopify customization is the process of tailoring your online store so it feels unique to your brand. Out of the box, Shopify themes give you a professional, ready-made design. But customization is what lets you adjust that design to match your brand identity and create a shopping experience that feels personal.
Done right, it’ll help you increase conversions. According to the Baymard Institute, brands that customize their checkout flow can increase conversions by 35%.
That can mean small tweaks, like changing fonts and colors, or bigger changes, like rearranging sections, adding custom content, or even building something entirely from scratch. With Shopify’s latest design updates, it’s easier than ever to customize your store without needing a single line of code.
Types of Shopify customizations
There are different levels of Shopify customization, depending on the look you want and your technical abilities. Some store owners only want to tweak the color and integrate a few apps, but others might want to code something brand new.
Here’s what you can do:
- Quick theme tweaks. Everyday adjustments, like swapping out fonts and logos, editing banners and images, and choosing whether to show things like stock levels or promo badges. For example, you might use a preset from the Shopify Theme Store and update accent colors to tie in with your latest collection.
- Block-based layout changes. Modern Shopify themes are modular, built from “blocks” you can drag and drop anywhere on the page. You can stack image galleries and reviews in the order, hide or reveal blocks, and shape each page’s design without code.
- AI-assisted customization. Shopify’s summer 2025 update (built into Horizon themes) lets you generate design blocks instantly with a text prompt. For instance, type “add a countdown timer under the product gallery,” and Shopify will create it instantly.
- Advanced customization. For more control, a Shopify developer can extend the existing functionality of a store with custom Liquid code and scripts, APIs, and metafields to build bespoke layouts and features.
Shopify customization: Hire a developer or do it yourself?
One advantage of starting with a Shopify theme is that many structural design decisions are already made for you. You don’t need to worry about page layouts or where to put each image within a complex website builder.
But to make your store reflect your brand, you’ll need to add your own touch. Think of it like decorating a house—the fundamentals are all there, but you get to choose the colors and tweak the décor.
Hire a Shopify developer
If you’re new to the world of web design, the amount of choices you have can feel overwhelming. You can change any color, swap layouts, or update elements with a click—but deciding what works best isn’t always easy.
For more complex functionality and design, hiring an expert is often more cost-effective than stumbling through it yourself—considering all the other important responsibilities you have.
The Shopify Experts marketplace helps connect you with experienced web designers and developers who know the ins and outs of the platform. They can guide you through decisions or handle the design work for you.
Customize your Shopify theme yourself
In some cases, the DIY route makes sense. Maybe you’re bootstrapping your business or already have the technical and design skills necessary to build a website on your own. Or maybe you just need simple functionality to start, with plans to upgrade later.
Regardless of the reason, Shopify’s theme editor is user-friendly, letting you customize the look and feel of your online store without any coding or design skills. With tools like Sections Everywhere, Shopify app embeds, and page templates, you can add engaging elements to your site with a few clicks.
With the Basic plan or higher, you can create and customize your store’s appearance using Shopify’s built-in theme editor.
5 ways to customize your Shopify store to make it your own
- Find the perfect theme in the Shopify Theme Store
- Edit your theme settings to adjust the look of your store
- Create templates
- Customize your store with Shopify apps
- Use Shopify app embeds to add more sections
These five approaches give you a flexible toolkit for customization.
1. Find the perfect theme in the Shopify Theme Store
While Shopify will default your store to either its Debut or Dawn theme, depending on whether or not you’re using Online Store 2.0, you don’t have to stick with it. The Shopify Theme Store offers hundreds of options, and choosing the right theme at the start saves time if you need specific features or functionality.

There are two main categories for Shopify themes: free and paid.
- Free themes. Best for new or smaller stores getting ready to launch or experiment with ecommerce. There are no additional upfront or recurring costs, but often come with limitations and little customization options. There are over 20 free themes to choose from.
- Paid themes. Best for growing businesses that need more features. Shopify offers more than 800 paid themes, ranging from $180 to $350 (one-time fee). While they require more money upfront, paid themes offer more graphic design functions, ecommerce tools, and robust features allowing you to further customize your online store.

Shopify custom themes vs. pre-built themes
When you’re setting up or redesigning a Shopify store, one of the biggest decisions is whether to start with a pre-built theme or invest in a custom theme. Both have their strengths, but it really comes down to budget, timeline, and how much control you want over the final look and feel.
Pre-built themes are ready-made in the Shopify Theme Store. You just have to install them, then you can make adjustments in the theme editor. They typically cost $200 to $400 (one-time). Because they’re already designed, you can go live faster, in days or weeks, depending on how much you want to tweak.
Maintenance is also easier because the theme developer handles updates and bug fixes. The tradeoff is flexibility: you’re confined to the theme’s framework.
Pre-built themes are best for:
- Small to mid-sized businesses that want a polished design without a big investment
- Brands aiming to get selling quickly
- Store owners who prefer built-in support and updates
Thanks to Horizon, today’s pre-built themes are more flexible, often offering customization levels that once required a custom build.

Custom themes, on the other hand, are designed and coded specifically for your brand, which gives you complete creative control. Costs can run from several thousand to tens of thousands of dollars, depending on complexity.
It also takes a lot longer to launch, because a full custom build can take weeks or months. That being said, you’ll have unlimited flexibility and can tailor every layout and feature so it looks the way you want it to.
You’ll need a developer (either in-house or freelance) to handle updates, bug fixes, and new features because you won’t get automatic theme updates like you do with pre-built options.
Custom themes are best for:
- Established brands needing a bespoke look or advanced functionality
- Stores with unique customer journeys or niche features
- Businesses with the budget and team to maintain custom code long term
Here’s a quick comparison:
| Pre-built themes | Custom themes | |
|---|---|---|
| Cost | $200–$400 (one-time) | $5,000+ (varies by scope) |
| Time to launch | Days to weeks | Weeks to months |
| Flexibility | Limited to the theme framework | Unlimited |
| Maintenance | Handled by the theme developer | You’ll need a developer |
| Performance | Vetted by Shopify for speed | Excellent if coded well, but variable |
| Support | Theme dev + Shopify | Your dev/agency only |
2. Edit your theme settings to adjust the look of your store
Once you know the general structure and functionality of your theme, you can focus on the design aspects of your theme customization. This part of Shopify customization ensures your online store matches your visual branding.
To customize a Shopify theme, navigate to the theme editor from your dashboard by going to Admin > Online Store > Themes > Customize.
The main areas you’ll want to focus on include:
Color palette
If you already have brand guidelines, adjust your Shopify theme settings to align with them. If not, you can use the colors from your logo.
Starting from scratch? Choosing colors for your brand can be intimidating. Do they look good together? Are bright colors or neutral colors a better fit for your brand? Look for inspiration in the types of products you carry. For example, if you sell wood furniture or leather goods, natural colors like brown, beige, and orange might be a great place to start.
You can also use an online color palette tool, many of which will offer examples of great color palettes created by other people or brands.

Once you’ve picked some colors that look good and fit with your products and your business, save the hexadecimal codes that represent your chosen colors. You can use this combo of six letters and numbers on online platforms and design tools to get an exact match anywhere you need to use your colors.
It looks something like this:
- #FFFFFF (white)
- #2D2D2D (very dark gray)
- #50B83C (green)
Fonts
Fonts are also a strong element of branding. Many of the best ecommerce store designs use a combination of different fonts, so you don’t have to stick to just one font or even one style. Find fonts that complement each other and work together without looking repetitive.
It’s generally best to stick to two or three fonts. Any more and you risk diluting your brand, as well as distracting from the flow of information itself. And while it’s tempting to get creative, aim for a balance between legibility, consistency, and clarity.
Pick complementary fonts
The quickest way to find perfect font combinations is by choosing styles within the same font family, such as Helvetica or Times New Roman. Font families have a few variations—assorted weights and styles—that already work well together.
A heavier weight font would be something like the bold version of the font for headings, while a style variation might be an all-caps version for subheads.

Pick compatible typefaces
If you’ve never worked with fonts before, here’s a quick primer on typefaces. There are a few different basic styles of text that you’ll find.
- Serif. These typefaces, like Times New Roman and Georgia, have the little feet at the ends of letters.
- Sans serif. These typefaces, like Arial, Helvetica, don’t have the little feet.
- Script. These typefaces are anything that looks like calligraphy or handwriting.
- Monospace. These typefaces have equally spaced letters, often seen in computer code. A good example is Roboto Mono.
You can pair fonts from different typefaces to get a strong contrast between them.
Combining typefaces based on contrast is great for establishing hierarchy. Contrasting typefaces makes it clear which paragraphs are headings and subheadings and which are body copy.
Hierarchy guides your customers to the most important information.
Use font sizes intentionally
Use font size intentionally to highlight what’s important and to guide users through your site. The more important your content is, the larger the font size should be.
Once you’ve chosen a font size for your body content and your headings, stick with it so your customers can easily tell what’s a headline and what’s a paragraph. Consistency makes your store easier to read and navigate—and fewer hurdles means faster sales.
3. Create templates
While it can be tempting to indulge in new fonts and colors on different pages, remember that consistency is the cornerstone of building a brand. Customers should be able to identify and navigate your store easily, and sticking to a core set of fonts, colors, and styles can go a long way toward that goal.
That’s why page templates or sections are helpful features for Shopify theme customization.
Page templates are useful for things you reuse frequently—like blog posts, landing pages, sales funnels, or even product pages. When you start with a template, you can maintain consistency as well as reduce the amount of creative brain power—and time—it takes to create each of these pages.
Sections are smaller templatized content blocks—like a contact form, call to action, or newsletter sign-up—that you plan to insert on multiple pages. You only need to update the content in that section once, and changes will automatically appear everywhere that uses that section.
To create and edit sections, go to your theme editor and click “+ Add section.” Choose a new section from the list or search for the section you want to edit. Use the ⋮⋮ icon next to drag and rearrange a section to change the order and layout of the sections on the page. Click Save when you’re finished.
4. Customize your store with Shopify apps
The Shopify App Store has more than 8,000 apps covering everything from design tweaks to advanced functionality. You’ll find apps across major categories like store design, marketing and conversion, orders and shipping, sales channels, store management, selling products, and finding products.
Within the store design category alone, you’ll find subcategories for content, design elements, images and media, navigation, site optimization, and more. It all comes down to identifying what you want to customize and then finding the app that will meet those needs.
Here are some custom changes you can make with store design apps:
- Change your search bar. Improve search, filtering, and product recommendations; add visual search; and enhance the overall search experience with apps like Shopify Search & Discovery.
- Add product recommendations. Suggest similar products to boost average order value. See how Thousand uses apps to do so.
- Incorporate customer reviews. Apps like Okendo and Judge.me will help you optimize for conversions with social proof via customer reviews.
- Build landing page templates. For more robust landing page customization and templates, use an app like Shogun, which features an easy-to-use drag-and-drop editor.
- Customize checkout. Match the checkout experience to your visual brand and optimize it to reduce friction and boost sales. Apps like Skip To Checkout and Zipify One Click Upsell can help you do exactly that. All plans from Basic upward support standard checkout. Advanced or full checkout customization—like changing the layout or behavior—is available only on Shopify Plus.
5. Use Shopify app embeds to add more sections
Shopify app embeds are app-provided elements that float on your storefront (like a chat bubble), or add code to your online store without being visible to your customers. They let you extend functionality without cluttering the page design.
Shopify merchant Ora Organic, for example, uses a Gorgias-powered live chat app embed, allowing users to engage with customer support while continuing their website browsing uninterrupted.

App embeds are managed through the theme editor and work with any theme version.
Like sections, app embeds need to be set up only once. So any change you make to the app embed will automatically be reflected across every page where the embed appears.
To customize Shopify app embeds, click on “App embeds” from the theme editor. Select the app embed you want to manage (or click the search bar and enter a keyword to search through your installed apps). Click the toggle to change its status (activate or deactivate). View app embed settings by clicking the expand icon (▸) to adjust details.
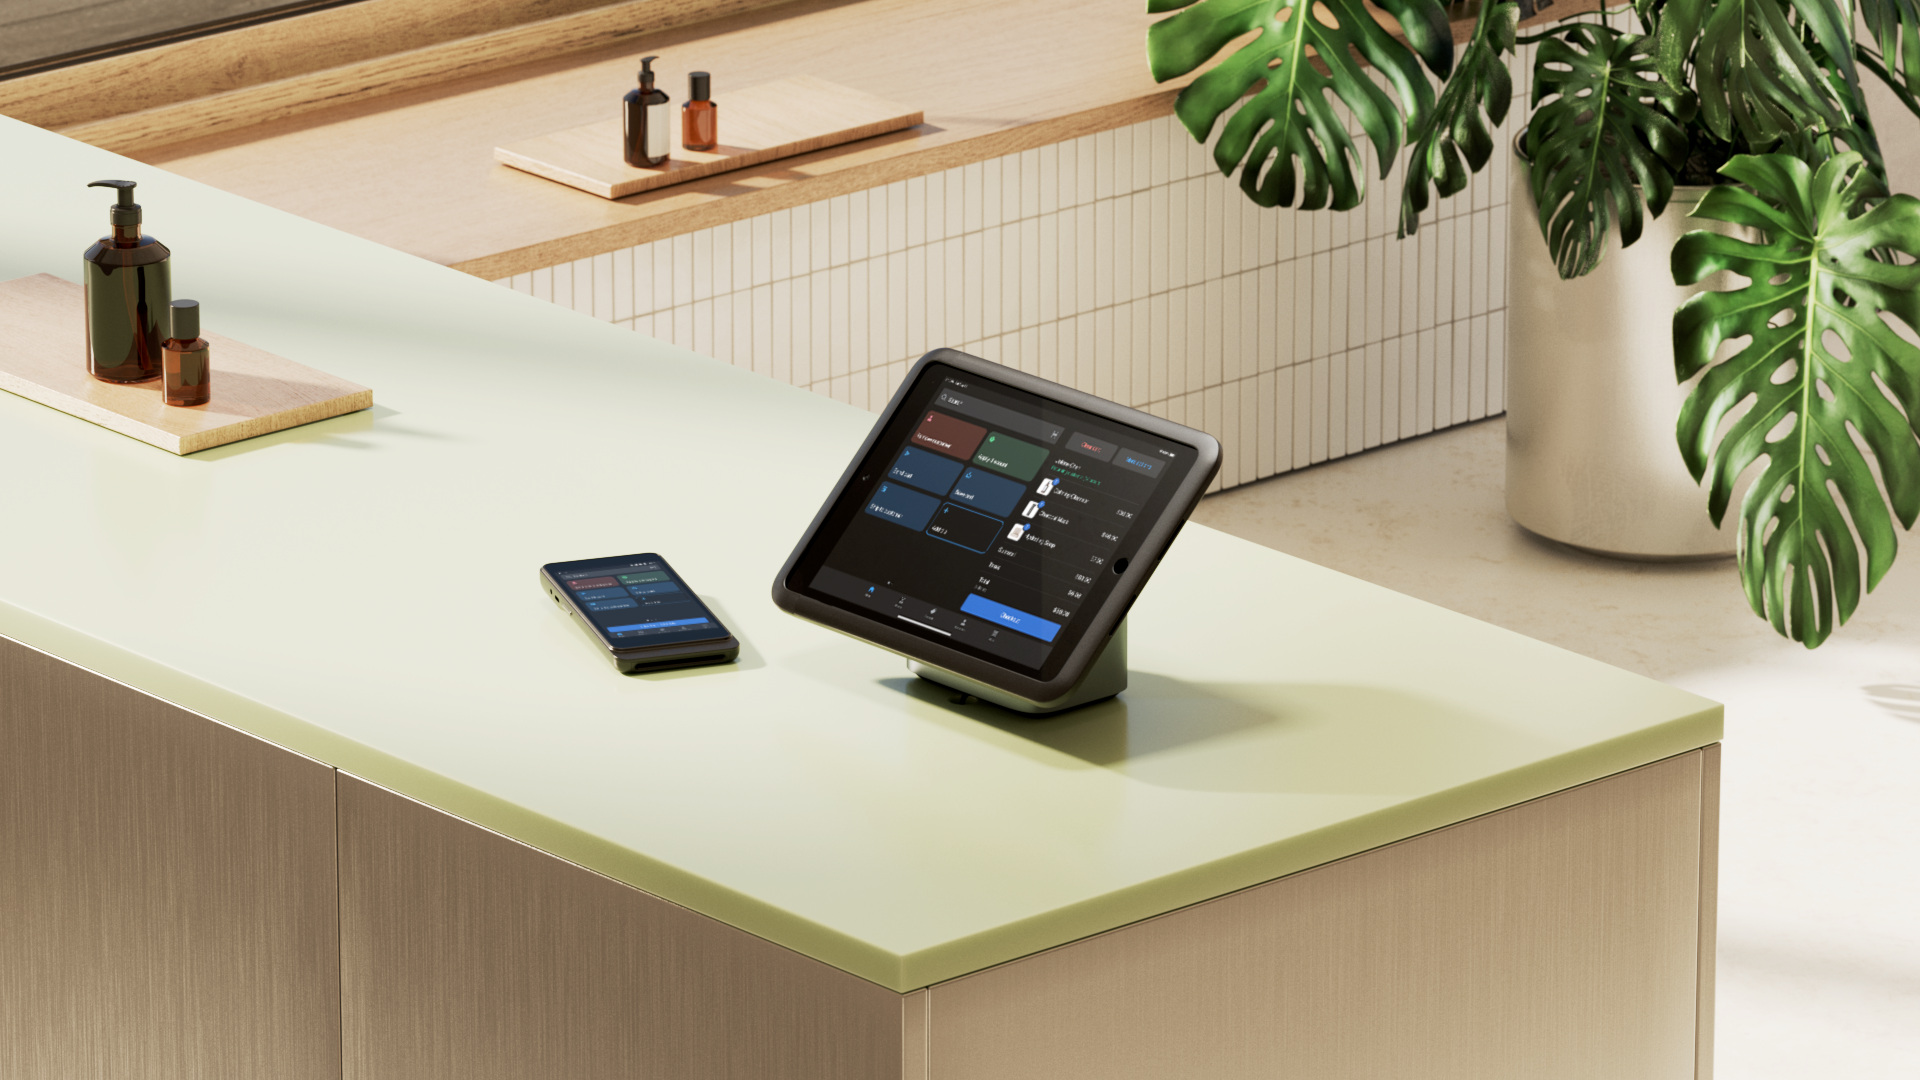
Using the Shopify theme editor
The Shopify theme editor is your main design workspace. It’s where you adjust the look and layout of your store without touching code.
Here are some helpful tips for making the most of it:
- Start with the homepage. Most shoppers land here first, and it sets the tone for the rest of your store. Build out your hero banner, featured products, and a call-to-action before moving onto smaller pages.
- Think mobile-first. More than half of ecommerce traffic comes from phones. Always preview on mobile before publishing.
- Duplicate your theme before experimenting. In Themes > Actions > Duplicate, make a backup copy before testing changes.
- Lean on presets. Many themes (including Horizon) come with multiple polished presets you can use as a base, then refine in the editor.
- Watch file sizes. Shopify has a 50 megabyte limit for theme uploads and a 20 megabyte limit for individual files. For images, aim for less than one megabyte each (ideally 500 kilobytes or less) and stick to recommended formats (JPEGs for photos, PNGs for transparent graphics, and SVGs for logos/icons).

Accessing the theme editor
Getting into the editor is simple:
- Log in to your Shopify admin.
- Go to Online Store > Themes.
- Under your current theme, click Customize.
That opens the theme editor, where you’ll see a live preview of your storefront on the right and a sidebar of editable sections on the left.

Key editor features and tools
Once you’re in the Shopify theme editor, here’s what you’ll be working with:
- Sections and blocks (sidebar). Shopify themes are built in modular sections. Add, remove, reorder, or hide sections, and edit individual blocks (like buttons, images, or headings).
- Theme settings. Control global styles, like your fonts, colors, favicon, checkout branding, and social links. Changing something here updates it everywhere.
- Device preview. Toggle between desktop, tablet, and mobile views to make sure your design works across all screen sizes.
- App embeds. Many apps can plug directly into the editor so you can drop features like reviews, chat widgets, or badges right into your theme.
- Dynamic sources. Pull in product details, metafields, or other dynamic data directly into your blocks. For example, you could show shipping info or add promotional messages tied to a metafield.
- Theme presets and styles. Some themes, including Horizon, come with multiple pre-designed “looks” (color palettes, font combinations, layouts) you can switch between for a quick starting point.
- Language editor. Customize the default text strings that appear throughout your theme (e.g., Add to cart > Buy now).
- Accessibility and SEO settings (in some themes). Add alt text, headings, and other optimizations to improve both usability and search visibility.
Advanced Shopify customization for developers
For brands with complex needs, Shopify offers ways to go beyond the theme editor, especially if you’re working with a skilled Shopify developer. They can go beyond the limitations of pre-designed website templates using code, APIs, and advanced customization tools.
Shopify’s dev documentation can help developers build apps, customize themes with code, and even create a framework for headless commerce.
Introduction to Liquid templating
Liquid is Shopify’s open-source templating language and the foundation of every Shopify theme. It lets developers create dynamic pages by pulling in content from the Shopify back end (e.g., products, collections, customer data) and rendering it in the front-end template.
With Liquid, you can:
- Use tags, objects, and filters to output dynamic data (e.g., {{ product.title }})
- Build reusable snippets and layouts for consistent design
- Create conditional logic; for example, showing a badge only if a product is on sale
- Extend or override theme templates with custom code
For example, this simple snippet shows how Liquid can check inventory and display different elements.
{% if product.available %}
<button>Add to cart</button>
{% else %}
<p>Sold out</p>
{% endif %}
Using metafields for custom data
Metafields let you store and display custom data that doesn’t fit into Shopify’s standard product fields. They extend your store’s functionality without altering the theme.
Some common use cases include:
- Adding size charts or care instructions to product pages
- Storing “back in stock” dates or preorder information
- Displaying custom icons or labels (e.g., “Vegan” or “Eco-friendly”)
- Creating unique content fields for blog posts or landing pages
And here’s how they work:
- Define a metafield namespace and key in the Shopify admin (e.g., details.material).
- Assign values to products, collections, or other resources.
- Call the metafield in your Liquid templates.
For example, the below code pulls in a custom “material” metafield and displays it on the product page.
{% if product.metafields.details.material %}
<p>Material: {{ product.metafields.details.material }}</p>
{% endif %}
Your Shopify, your way
Every Shopify theme meets a high standard, packed with built-in features that let brands offer discounts, recommend products, capture emails, and do more for buyers. Plus, all themes get free updates, so you always have the latest version available.
Optimized for selling online, themes are designed to load fast, work seamlessly on mobile, and provide the best checkout experience around—all while complementing your existing brand. With the right customization, your store becomes more than a template: it builds trust and creates a shopping experience your customers return to.
Read more
- What is Shopify and How Does it Work?
- How to Build a Business Website for Beginners
- The Best Shopify Ecommerce Themes for Your Online Store
- How To Create a Coming Soon Landing Page (+Examples, 2024)
- Etsy and Shopify- How Three Makers Used Both to Grow Their Businesses
- A 14-Point Ecommerce Checklist to Launch Your Shopify Store
- 24 Free Shopify Apps to Help You Build, Manage, and Grow Your Store
- 10 Ways How to Optimize Images for the Web for SEO
- Homepage Design 101- What to Include on the Front Page of Your Website
- Brand Values- A Competitive Advantage for Your Business
Shopify customizations FAQ
Does Shopify allow customization?
Yes, you can customize your Shopify. Choose a theme and then navigate to the theme editor to customize settings, checkout, website design, and more.
What is Shopify customization?
Shopify customization involves making changes to the front or back end of your Shopify website. This could include design (fonts, colors, layouts), payment options and checkout process, website navigation, and more.
How do I fully customize Shopify?
You can fully customize Shopify by starting with a theme and using the theme editor for design changes. Extend functionality with Liquid code, metafields, and apps. For complete control, a Shopify developer can build a custom theme or integrate APIs to create tailored shopping experiences.
Is Shopify easy to customize?
Yes, Shopify is easy to customize. You can navigate to the theme editor to make changes yourself or hire a professional to customize your Shopify website for you.
How can I get help with customizing my Shopify store?
The Shopify Experts marketplace helps connect you with experienced web designers you can hire to give you expert guidance on your Shopify store, or even to do the design work for you.
How do you make something customizable on Shopify?
To make a product customizable, you can add options like text fields, dropdowns, or image uploads using Shopify’s built-in custom fields or product personalization apps. Developers can also use metafields or custom code to create more advanced customization options, like engraving requests or bundle builders.
Do I have to customize my Shopify store?
No, you can launch with a pre-built theme that looks professional out of the box. Customization is optional, but even small tweaks (like adding your logo, colors, and fonts) can make your store feel more aligned with your brand and improve the customer experience.